Connect Gmail
Gmail uses OAuth through a small app you register in your own Google Cloud project (see BYOC, explained for why). This takes about five minutes, once.
Recommended: connect Gmail with SMTP/IMAP and a Google App Password rather than OAuth — no 7-day reconnecting and no Google audit. New in 8: if you do use OAuth, a workspace can hold several Google apps (add them under Settings), and each connected account remembers which app it came through.
1. Create a Google Cloud project
- Go to Google Cloud Console and sign in with the Google account you want to send from (or any account — the project owner doesn't have to be the sending inbox)
- Click the project dropdown at the top → New Project
- Give it any name (e.g. "SubsiMail") and create it
Screenshots of Google's own console age fast as they redesign it — their own current, maintained walkthrough for this exact step: Creating and managing projects.
2. Configure the OAuth consent screen
- In the left sidebar: APIs & Services → OAuth consent screen
- Choose External user type, fill in the required app name/support email fields
- Leave publishing status as Testing — do not click "Publish App"
- Under Test users, add the Gmail address you're going to connect
Staying in Testing mode is deliberate, not a shortcut. Google's strict app-review process (CASA) only applies to Published apps — a Testing-mode app with test users added never needs review, exactly the BYOC model this is built around.
The tradeoff: Testing-mode refresh tokens expire after 7 days, always. This isn't a bug or something you configure — it's a hard Google-side limit on every Testing app, regardless of how often the account is used. Every connected Gmail account will need reconnecting roughly weekly unless you publish to Production (which then requires a paid CASA audit, since this app requests the gmail.readonly scope). For unattended long-running campaigns, most users are better served by SMTP/IMAP with a Gmail App Password instead — see this tradeoff explained in full.
Google's own current walkthrough for the Testing/Production publishing status and test users: Manage app audience.
3. Create OAuth credentials
- APIs & Services → Credentials → Create Credentials → OAuth client ID
- Application type: Web application
- Under Authorized redirect URIs, add:
(use your actual SubsiMail domain, matching what's in your license)
https://your-domain.com/oauth/google/callback - Create it, then copy the Client ID and Client secret shown
Google's own current guide for creating and managing OAuth client credentials: Manage OAuth clients.
4. Enable the Gmail API
- APIs & Services → Library, search for Gmail API, and click Enable
Skipping this step is the single most common way this breaks. If you connect successfully but sending fails with accessNotConfigured or SERVICE_DISABLED, this is the fix — see Gmail OAuth errors.
5. Connect in SubsiMail
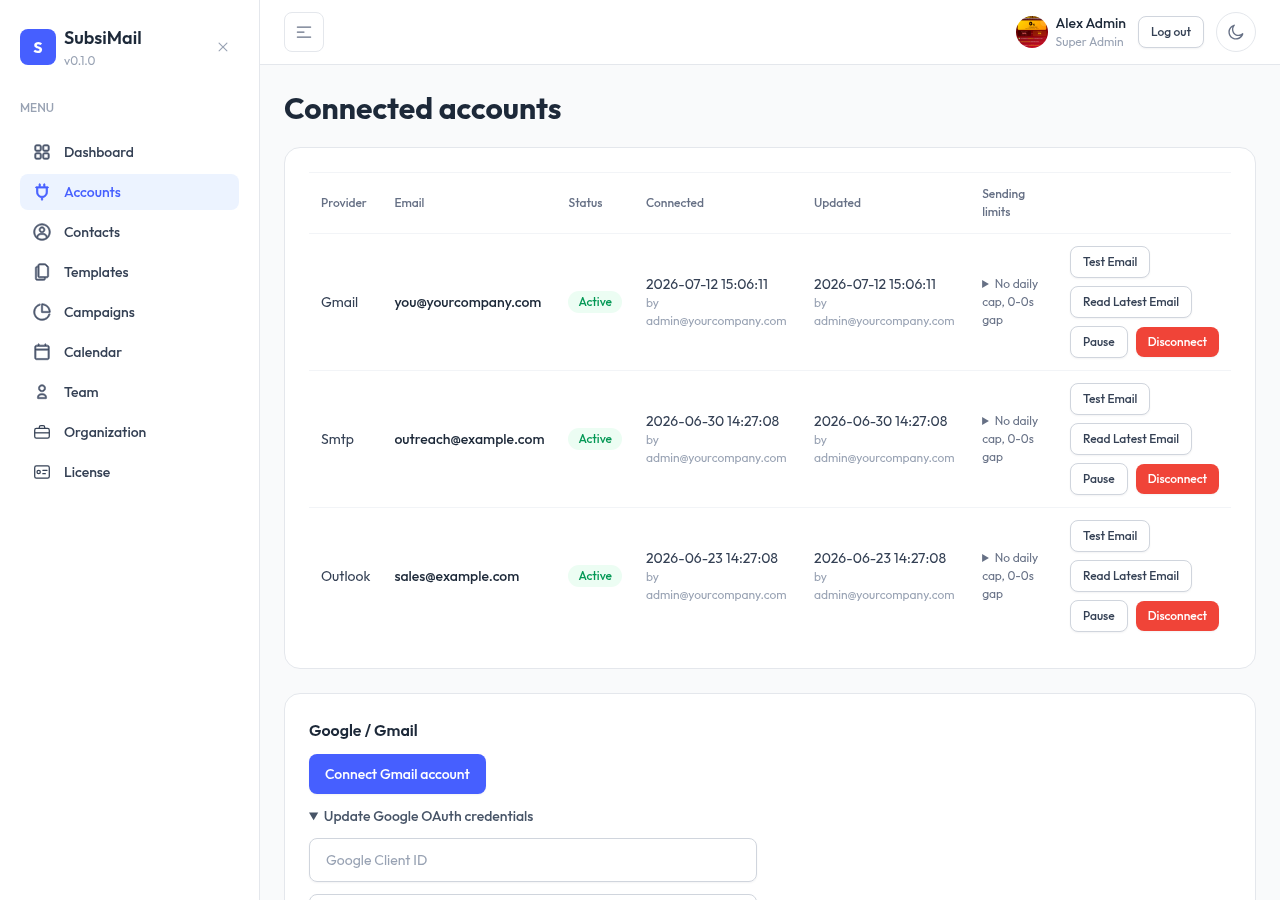
- In SubsiMail, go to Accounts
- Under Google / Gmail, paste your Client ID and Client Secret and save
- Click Connect Gmail account — you'll be sent to Google's consent screen, then back to SubsiMail once approved
SubsiMail requests three scopes: reading your email address (to identify the inbox), sending mail, and read-only inbox access (used only for stop-on-reply detection).