Steps & sequences
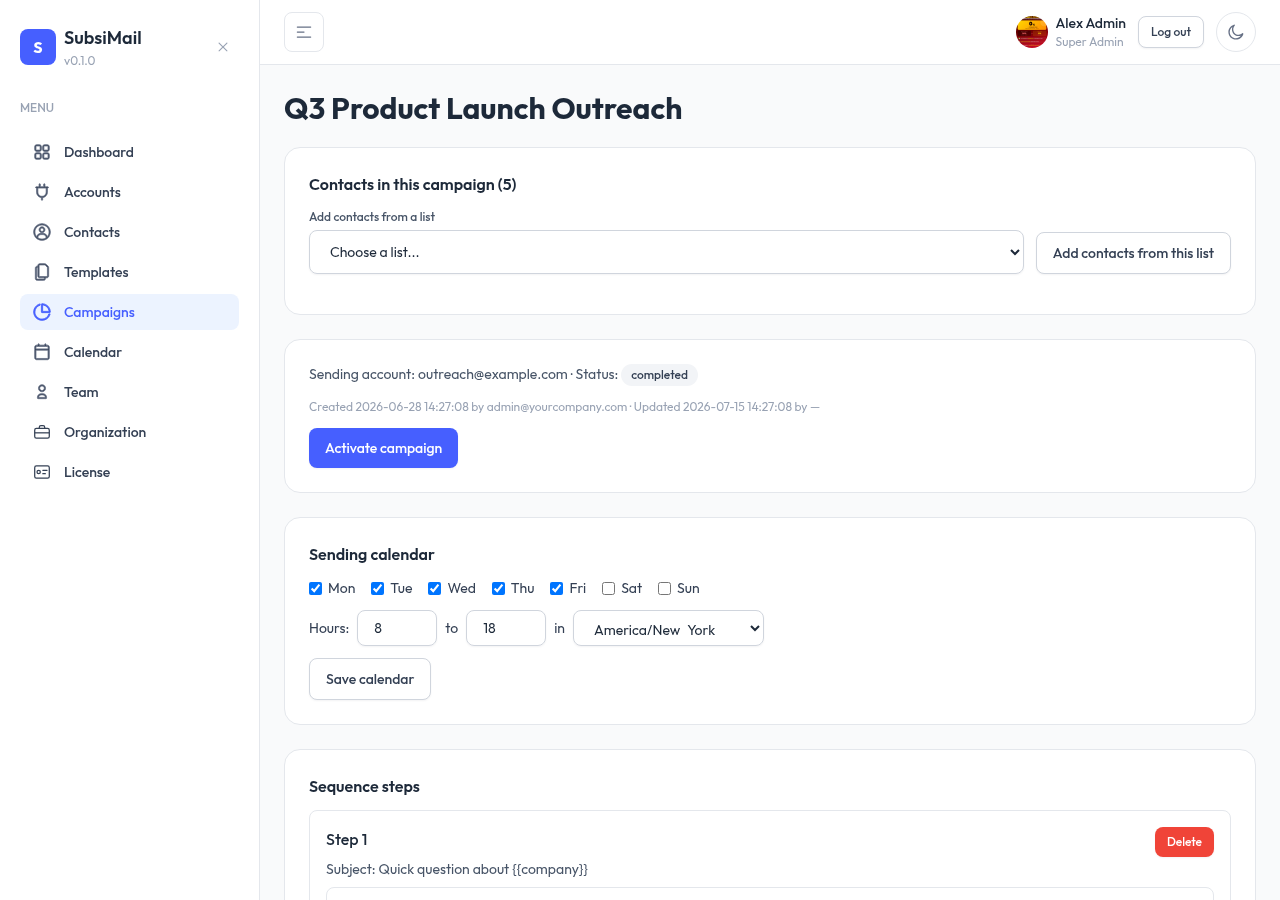
A campaign's steps are the actual emails in the sequence — step 1 sends first, then each following step sends after its own wait period, as long as the contact hasn't replied.
Adding steps
From the campaign detail page, click Add step and set:
- Subject (step 1 only — see below)
- Body — the message content
- Wait days — how long after the previous step to send this one
Why only step 1 has a subject
Steps after the first are follow-ups in the same email thread, not separate emails — that's what makes threading work. Every step beyond step 1 automatically reuses step 1's subject with a Re: prefix, so the subject field only appears on step 1; it wouldn't do anything on later steps.
Delays, conditions and waiting for a click
Click the pill between two messages to set when the next one goes out.
- The delay can be in minutes, hours or days. A follow-up waits at least 5 minutes after the message before it, so a reply that has just arrived is seen first. Sending hours and the mailbox's daily limit still apply, so “5 minutes” means “the next batch after that”.
- Who gets it: everyone, only people who clicked a link or opened an earlier email of the campaign, or only those who haven't. A step whose condition isn't met is skipped and the person moves on to the next step.
- Wait for them to do it, up to… (for opened / clicked): the message goes out the delay you set after they click or open, for example “5 minutes after they click, waiting up to 2 days”. If they never do within the limit the step is skipped.
Clicks in the first seconds after an email is sent are ignored: company mail scanners open every link, and treating those as interest would send follow-ups to robots. Opens are approximate for a similar reason (Apple Mail and Gmail load images in advance), so “clicked” is the more reliable condition. Step 1 always goes to everyone straight away.
Auto-reply
At the bottom of a campaign's Sequence tab, When someone replies can send one fixed message in the same thread. It is sent once per person, only for replies that arrive after you switch it on, and never to out-of-office or bounce messages or to someone asking to stop or unsubscribe. Merge tags work, it comes from the campaign's mailbox and it counts toward that mailbox's daily limit. The sequence stops on a reply either way.
HTML source
The step body editor accepts raw HTML source directly — useful if you're pasting in a formatted signature or already have HTML from another tool, rather than being limited to a plain rich-text box.
Merge tags
Personalize any step with merge tags pulled from the contact being sent to:
Hi {{name}},

Noticed {{company|your team}} might be a fit for...
Supported tags: {{name}}, {{email}}, {{company}}, and any custom field you've defined, by its key. Add a fallback with a pipe — {{company|your team}} — to render that text instead when a contact has no value for that field, rather than leaving a blank.
Preview before sending
From a step, click Preview and pick a real enrolled contact to see exactly what they'd receive — subject and body fully rendered with that contact's actual data, not a generic mockup.
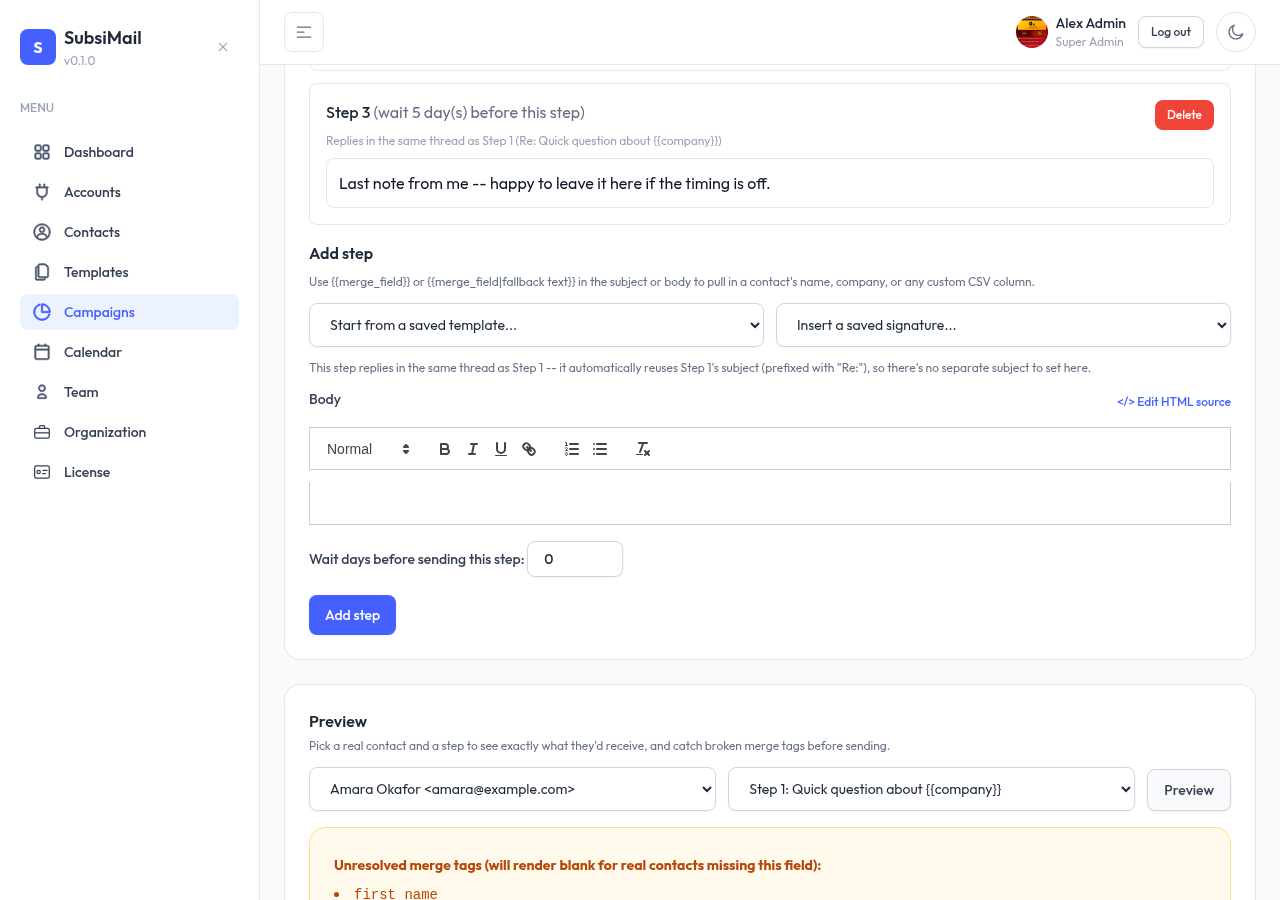
The preview flags two things worth catching before you activate a campaign:
- Unresolved merge tags — a
{{tag}}with no matching field and no fallback, which would otherwise render as an empty gap - Spam warnings — content patterns that commonly trigger spam filters
A/B testing
Turn on A/B testing on the campaign's Settings tab to split enrolled contacts into two groups, A and B, and compare how each does. The split happens once, at enrollment, and stays fixed for a contact across the whole sequence — someone isn't re-randomized on step 2 just because they got a reply on step 1.
- Subject and/or body — on a step's editor, check Test a B variant of this message to write a second subject (step 1 only) and/or body. Leave either blank and group B just gets group A's version of that one — testing subject alone, body alone, or both is all fine.
- Send time — on the Schedule tab, check Give variant B its own send-time window to send group B in a different hour range than group A. Leave it off and both groups send in the same window.
Split percentage (default 50/50) is also on the Settings tab. Results show side by side on the campaign's Insights tab — sent, open rate, click rate, reply rate, and bounces for A vs. B — and that's it: SubsiMail never auto-picks a winner or reroutes remaining sends on its own.